 Lifetime Warranty
  60 Day Returns Policy
 1-2 Day Delivery


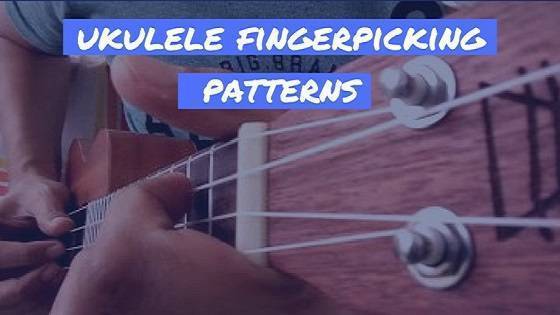
Ukulele Fingerpicking Patterns for Beginners
You just learned how to play the ukulele and recently, you’ve mastered the different strumming patterns.
You feel so accomplished that you can now sing and play the uke just like your old folks who taught you how to play.
And then one day, you saw Jake Shimabukuro on Youtube...
His fingers were so fast.
His fingerpicking skill is beyond godlike. You feel the urge to play just like Jake.
But how?
Now you’re wondering, how can a beginner like you learn those tricks?
Fastword...
Imagine you can now fingerpick a ukulele with ease. You know how to control each finger, you can play different ukulele fingerpicking patterns. And, you’re no longer intimidated by fingerpicking songs that you want to learn. How great would that be?
But right now, that seems to be impossible to pull off, isn’t it?
You’re a bit clueless on how to learn this technique. When you watch how those pros fingerpick the ukulele, you feel overwhelmed and think that you won’t be able to do that. You tried to fingerpick but you get confused on which string to pick.
Just like you, a lot of people get stuck at strumming and never tried to explore how to fingerpick a ukulele. They felt that learning how to fingerpick is a very complicated task.
It doesn’t have to be that way…
You can actually learn the skill without hiring a ukulele teacher. Well today, I’m going to show you the basics of fingerpicking. After reading this article, you’ll know how to control each of your fingers and learn some fingerpicking patterns that you can use to play different songs.
Are you ready? Let’s get started.
The Basics of Ukulele Fingerpicking.
First off, the very basic of fingerpicking is to learn how to use your thumb to pick each string of the ukulele. This is called Thumb-style picking.
If you’re used to thumb strumming, then this should be an easy trick for you. What makes it different is that instead of strumming all the strings, you use your thumb to pick a particular string.
Before we start practicing, let’s talk about the musical theory that can help you understand how the notes are played when you fingerpick.
ARPEGGIO - is a technique in music where notes in a chord are played or sung in sequence. The word arpeggio originated from the Italian word arpeggiare which means “to play on a harp”. It is called “broken chord” in layman’s term.
Here’s how it goes. When you execute an arpeggio, it requires you to play the sounds of a chord individually to differentiate the notes. All the notes belong to one chord. Let’s say, for example, an arpeggio for the C Major Chord going up two octaves would be the following notes - C, E,G, C, E,G,C.
To get started, here are a couple of ukulele fingerpicking exercises that you can practice with your thumb. Start with the first 3 strings from the top (G, C, and E). To make it easy for you to familiarize with the pattern, you can begin without holding any chords at first - pluck with an open string.
-
Quarter Note Arpeggio Fingerpicking Pattern
G|----0---------0|----0---------0|
C|------0---------|------0---------|
E|---------0------|---------0------|
A|----------------|-----------------|
G-C-E-G, G-C-E-G
Play the ukulele following the G-C-E-G pattern. Practice until you’ll be able to play it without looking at the strings. Once you learned the sequence by heart, you can now integrate a few chords while you’re plucking the strings. Keep changing chords as you play with the fingerpicking pattern. Repeat until you become familiarized with it.
G|----0-----------|----0-----------|
C|------0---------|------0---------|
E|---------0------|---------0------|
A|-------------0--|--------------0-|
G-C-E-A
This pattern is quite simple. You just need to pluck each string starting from the G string down to the A string. Again, start with the open string and then once you’re comfortable with the pattern, start playing different chords while following the sequence of plucking the strings.
G|----0---------------|----0---------------|
C|------0-----------0-|------0-----------0|
E|---------0------0---|---------0------0--|
A|-------------0------|--------------0-----|
G-C-E-A-E-C, G-C-E-A-E-C
This is one of the most common fingerpicking patterns that you’ll be able to use when you play. Repeat the pattern until you feel comfortable.
Once you’ve mastered these patterns with your thumb, you can go ahead and play using each finger (index, middle, and ring finger).
HOW TO USE ALL YOUR FINGERS
Now that you already know how to fingerpick with your thumb. Let’s go ahead and play the ukulele using your other fingers. This time, we will designate each finger on a particular string.
Take note that you will not be using your pinky finger to pluck the strings. That’s because there are only four strings to play and the other four fingers can basically get the job done. This is totally different when you are used to playing the guitar.

Nevertheless, the pinky finger can still be helpful - you can use it to stabilize the position of your hand when you play. What you’ll need to do is to put your small finger on the top of your ukulele, just below the sound hole. What it does is it provides a little bit of clarity and accuracy in your fingerpicking.
Two-Finger Style Picking
When you do the two-finger style picking, you will use your thumb and index finger to pluck the strings. The thumb will pick the G and C string while your index finger will take care of E and A strings. Now, go back to the fingerpicking patterns that we discussed earlier and play each of those patterns using your thumb and index finger.
Three-Finger Style Picking
This can be a little bit tricky in the beginning so be patient when you practice. You will be using your thumb, index, and middle finger. Your thumb will take care of the G and C string. Index finger picks the E string, while the middle finger will play the A string. Again, go back to the fingerpicking patterns and play using your thumb, index, and middle finger.
Four-Finger Style Picking
Four-finger style is almost identical with how you play the three-finger. What makes it different though is that each finger is assigned to each individual string. So here’s how they are designated:
G String - Thumb
C String - Index Finger
E String - Middle Finger
A String - Ring Finger
Go back to the fingerpicking patterns and play using these four fingers.
Changing Chords
Once you’ve mastered these basic fingerpicking patterns and learned how to use each of your fingers to pick the strings, then your next goal is to learn how to change chords while fingerpicking. You can start with the easy chords right down the nut. Play with the G-C-D transition and repeat the rotation of the chord changes until you master it by heart. Then you move on to the next chords.
CONCLUSION
Learning how to fingerpick is not that difficult as long as you follow the basics that I laid out on this tutorial. Of course, you won't become a master ukulele player overnight. But with regular practice, I won't be surprised that one day, you're going to master all the tricks that you need to learn.
Now, it’s for you to choose which one of these fingerpicking styles are you going to use. Some prefer just the two-finger, Some are more comfortable with the three-finger, while others play with four-fingers. Regardless, it’s still worth it if you learn how to play all of these fingerpicking styles.
So what are you waiting for? Have a go and start fingerpicking with your favourite song!


This website helped me with fingerpicking a lot. I’m very grateful for this.
Leave a comment